While the SherpaShare App is designed to run in the background and track your driving mileage automatically, that alone is not useful if you don’t know what to do with this mileage afterwords. Here are 5 tips on viewing, labeling, editing, adding, and exporting your mileage.
Pro Tip: Download the free app first on iOS or Android, then read below
How to see your past trips
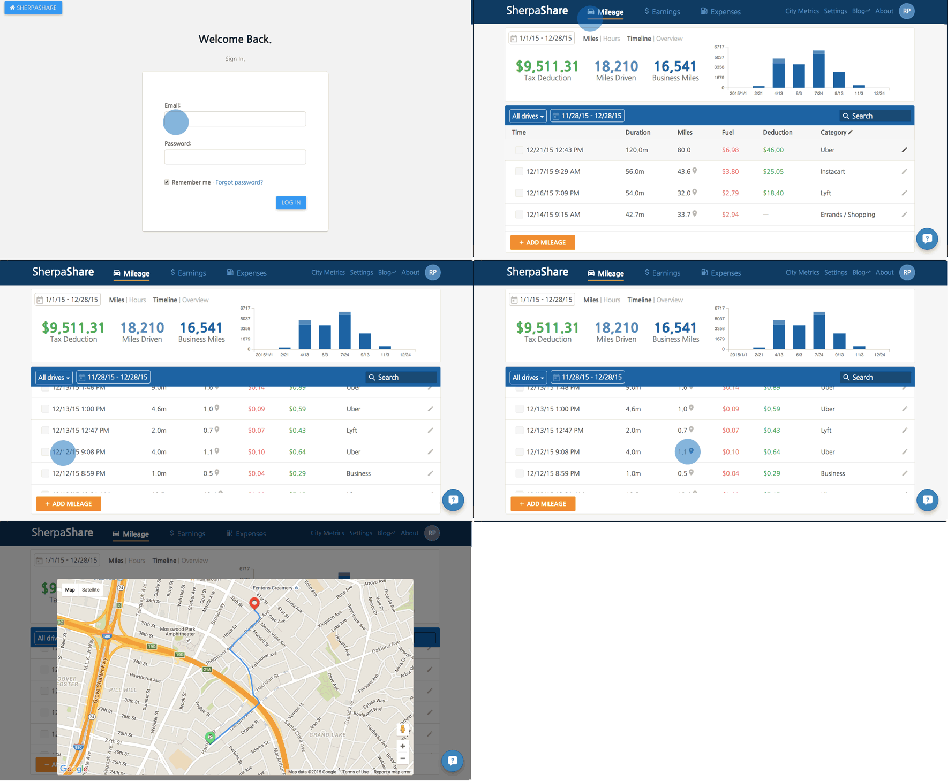
When you login to your web dashboard, under the Mileage screen you’ll see a list of your tracked mileage. You can scroll or search by date, and tap the map marker icon under Miles. Once you do, you’ll see the full map of that trip.

How to create labels for your past trips
On the mileage settings page you can add and subtract categories you’d like to have as quick labels for the app. You can also navigate on the top right menu on the dashboard (under your initials). Click the “x” to remove a category or type in a new one and click add.

How to label or re-label trips
Back on the mileage dashboard page, find the trip you’d like to label or re-label. Click the edit button on the right side of the page, then click the new label. Your mileage is re-labeled!

How to manually add in mileage
For past mileage or missing mileage that you have a record of, but is not on SherpaShare, you can manually add it in. Click the orange Add Mileage button at the bottom of the page, choose the date and time window, put in the mileage, categorize the trip, and click “Save”.

How to export your mileage
Find the miles you’d like to export and click the checkbox on the left. Once you’ve checked all the miles you’d like to export, click the “Export” button on the bottom right. A pdf will open up for you to save the miles or pass along to your tax professional.
UPDATE: You can download your 2015 mileage information tracked on SherpaShare under “Get 2015 Report” on the Dashboard

Bonus: How to quickly label within the app
In case you haven’t discovered this yet, you can quickly label within the app, and now there are no excuses. By tapping the arrow on either the “Work” or “Personal” tab you’ll see a list of pre-defined labels for you to use. These are the same labels you can customize on the website, as mentioned above. Hope this makes it easier for you to quickly add the category or purpose for you trip, which is necessary for the IRS.

PS – We’ll be doing lots of tax education starting January 1st, so be sure to check back on the blog often.
Sometimes i find it hard to classify something because the beginning trip is behid the main screen and i cant get to it until i clasdify the last screen.
Minor problem overall
LikeLike
At the beginning about 5 months I drive for Uber than LYFT I didn’t keep track on miles at all until I find out the sherpashare, so when can I find out the previous miles and gas,do we need to have statement and gas recipe to file tax.please help thanks
LikeLike